Occlusion planes
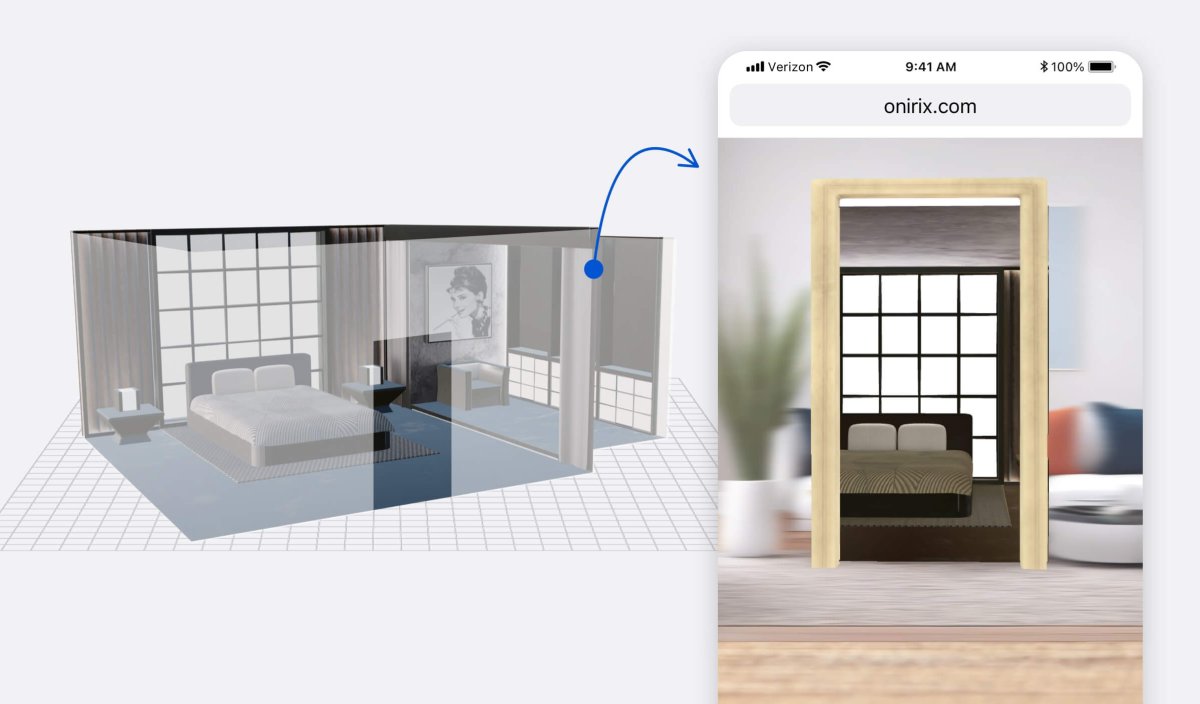
An occlusion plane allows you to either create a transparency in your 3D object or occlude (total or partially) any element in the scene. This effect opens the door to more innovative and creative AR experiences like portals or similar effects.
How to use an oclussion plane in Onirix Studio
If you want to create the occlusion plane effect just take this 3D model we provide, upload it as a new Onirix asset and use it in the scene editor. Here you can access to the occlusion-plane.glb model.
You can download this same experience template from our library and start testing it in your Onirix account
Just drag and drop to your scene and place it over the parts you want to hide from the user's view, like we do in this video sample:
How to create my own oclussion plane
In order to create an occlusion plane, we propose the following workaround with Blender and Three.js:
- Using a mesh, add an “occlusion” custom property and set it as true.
Note: If you want occlusion to be double-sided, configure the occlusion mesh material with backface culling.
- Export it as GLB (check that custom properties are selected).
- Import from Three.js, traverse object to find the occlusion mesh and set the “colorWrite” property of the nodes to false.
- This will make the mesh to render transparent while occluding other objects:
   model.traverse((object) => {
        if (object.isMesh) {
            if (object.userData.occlusion) {
                object.material.colorWrite = false;
                object.material.side = THREE.DoubleSide;
            }
        }
}); - Upload this asset to Studio. It will create the desired effect if we detect that the node has been marked with the custom prop “occlusion”.
- Once you have it in your asset library feel free to resize it and use as many as you need to achieve the effect you are looking for.
How to use all this to create my own web AR portal
Cloud hosting: from the experience library
You can access our experience library and download our Occlusion planes for portals in AR template. Click in the Add to Studio button and the experience, with all its content, will be included in your Onirix account immediately.
Self-hosting with Engine SDK
If you want to take it to the next level and create your own portal, host it on your server, and simply use our surface tracking to place it in the real world with webAR, you can use our Engine SDK to program your experience. In this github post we show you step by step how to do it, from the creation of your blueprint in Blender, to the generation of the experience in JavaScript: